
Browse docs
Document templates
Open Document templates in the File Explorer. Search by name, code or key and use the visibility filter to find shared or personal templates. Template management requires the appropriate permissions.
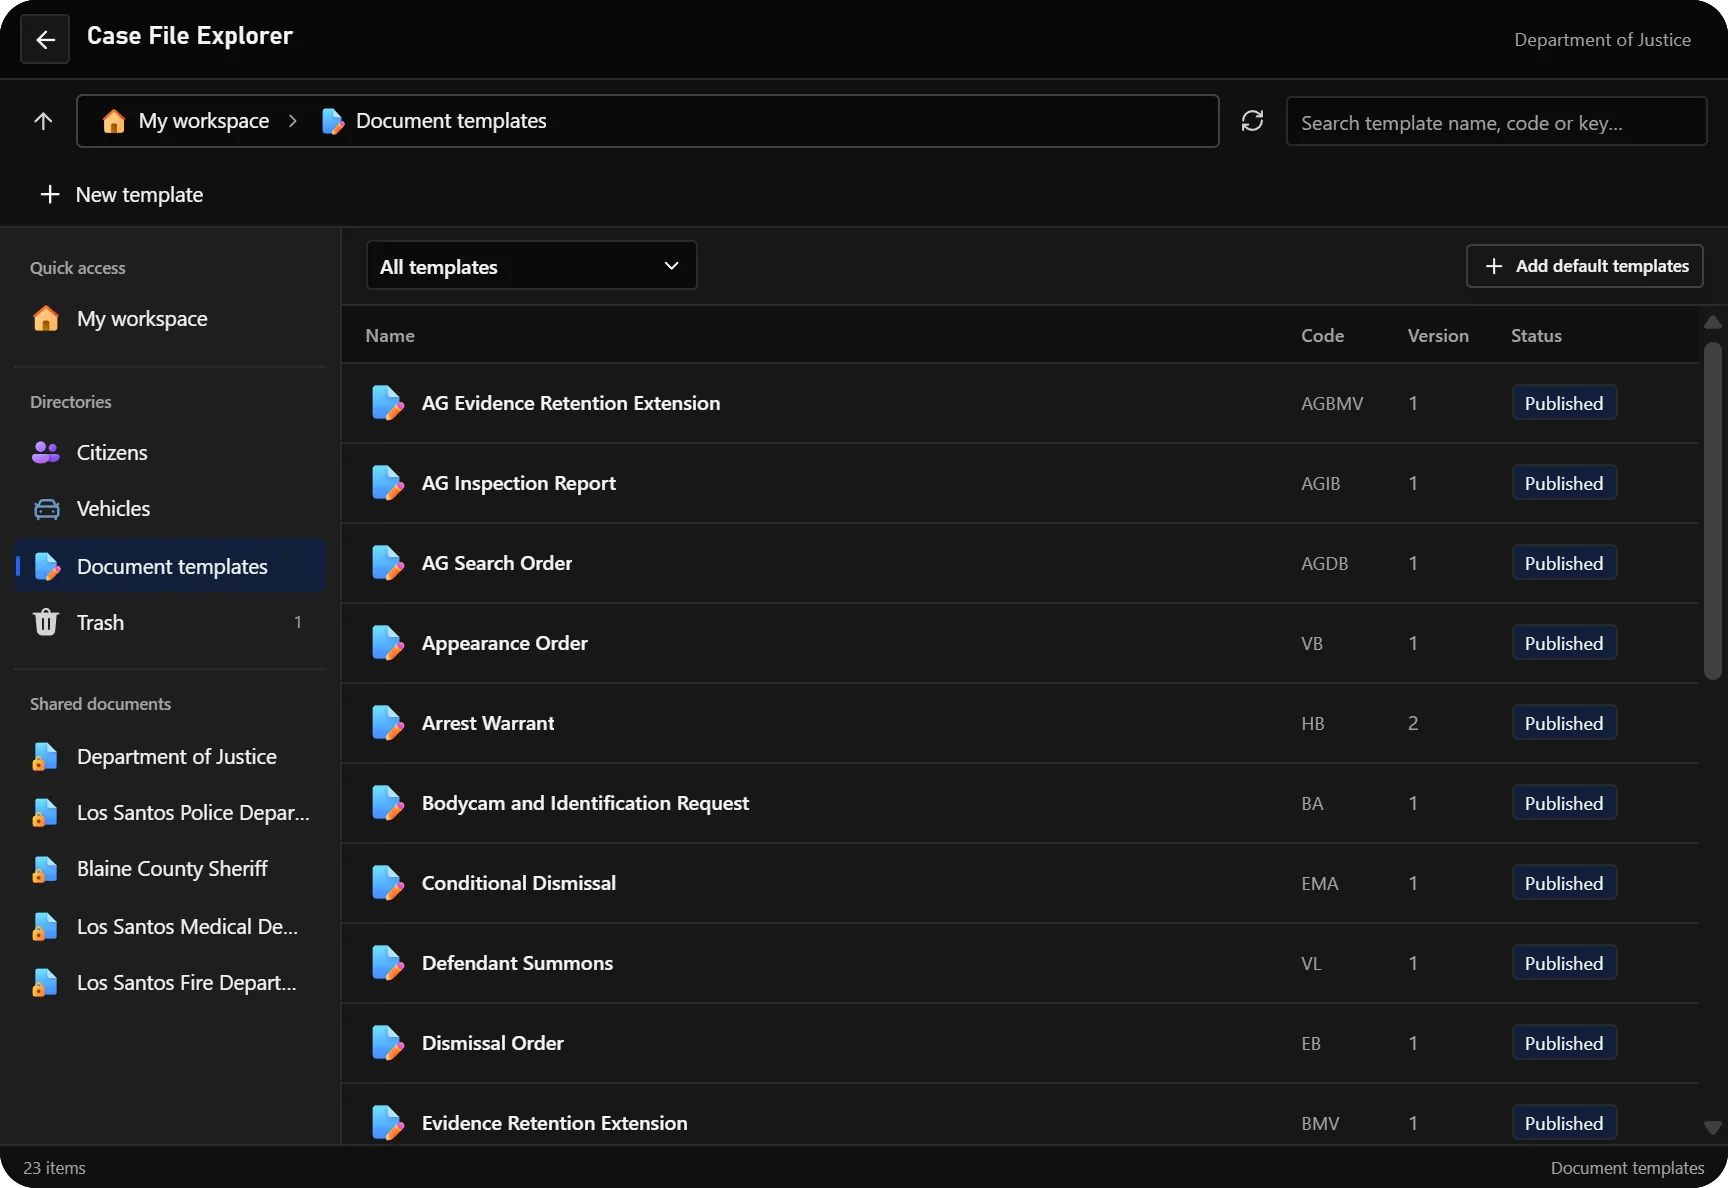
Shared and personal templates
Shared templates form the job's maintained library. Authorized template managers publish them for other document authors. Personal templates belong to their creator. Create one from scratch or copy an existing template. The Documents and Registry tabs separate ordinary documents from register certificates; the Registry column lists every register using a certificate template.
Copy a template
Right-click a template and choose Copy template, or use that action in its editor. An independent unsaved copy opens with a suggested name, key and code. Its fields, page settings, body, header/footer, seal and signature policy are retained. Change what you need, review it and save or publish.
Template managers can create a shared copy; staff with personal-template access can create their own variant. The copy records the source version and keeps its registry category. Editing or publishing it does not change the original. A copied certificate becomes a register's chosen layout only when that register's documentTemplate or inactiveDocumentTemplate is configured to use its published key.
Create your own template
Create or copy a template
Choose New template, or right-click an existing entry and choose Copy template. Select its visibility and enter a descriptive name. Shared templates also require a unique key and code; the copy action suggests unused values.
Set the reference format
Choose the reference format and inspect its preview. It controls the references of documents created from this template version.
Design the pages
Edit the body, header and footer. Set the page layout and colors, add text and tables, and insert the images needed for your own stationery. Check the paginated preview rather than only the editing area.
Define and place the fields
Add each input field, set its key, label and type, then insert its placeholder where the value belongs. Configure required fields and selection options as described below.
Place signature lines
Define the required lines, select each line's role and place it in the document body. Review who must sign the document.
Register certificates can use the recording employee's saved name stamp instead of requiring a new signature. See Registries and certificates.
Review and publish
Enter a change reason and confirm that the template was reviewed. Resolve validation errors, then save the personal template or publish the shared template version.
Required fields and placeholders
Each template supports up to 32 fields. Available types are text, multiline text, single selection, multiple selection, date, time, date/time, number, money and checkbox.
For every field:
- Choose a stable key and a clear label.
- Select its type and applicable length limit.
- Define allowed options for selection fields.
- Enable Required when the document needs a value.
- Insert the field's placeholder into the body, header or footer.
A defined field must actually appear in the template. Unknown placeholder keys and malformed tokens fail validation. Use the editor's placeholder controls to insert them consistently.
For example, add a required text field with key SUBJECT_NAME and label Subject name, then insert its placeholder where the person's name should appear. An optional multiline field can hold additional remarks. A required checkbox means the author must check it; it is not merely a yes/no question that accepts an unchecked answer.
The system placeholders DOCUMENT_NUMBER, PAGE_NUMBER and PAGE_COUNT provide the generated document reference and pagination. They are different from the reference-format tokens below.
Header, footer, logos and watermarks
Use the region selector or double-click the header/footer to edit that region. Logos are template images: insert or replace the image you want, then adjust its size and alignment. No image is required; a reserved logo area can remain empty.
Use the watermark action to insert, edit or remove a watermark. The image dialog provides width, height, aspect-ratio lock, horizontal and vertical position, opacity and rotation. Check readability on every page after changing it. Existing document versions keep the header, footer and watermark captured from their own template version.
Signature lines
A template can define up to eight signature lines. Give each line a meaningful label and assign a prosecution, judiciary or participant role.
Place signature lines in the document body using Place in document. Header and footer regions do not accept signature fields. The template defines where the line belongs; the server supplies the actual signer, signature and time when it is signed.
See Documents and signatures for direct participant requests and the rule that signatures do not carry over to changed drafts.
Reference formats
| Token | Value |
|---|---|
{TEMPLATE} | Template code |
{INITIALS} | Author initials entered during creation |
{NAME} | Author name |
{NUMBER} or {NUMBER:3} | Document sequence, optionally padded to a width of 1–12 |
{REFERENCE} | Required manual reference input |
{CASE} | Case reference |
{YEAR}, {MONTH}, {DAY}, {DATE} | Creation date components |
For example, DOJ-{TEMPLATE}-{INITIALS}-{NUMBER:3} produces a reference such as DOJ-HB-XY-001. A format must contain {NUMBER}, {REFERENCE} or {CASE}. The sequence is document-wide rather than restarting for each template or year. Reference text is not a substitute for the document's internal identity.
Publishing a new reference format affects newly created documents. Existing documents, signed versions and copies keep their stored references.
Import a DOCX layout
Use Import DOCX to bring supported document content into the template editor. Review the imported fields, page settings and any imported header/footer. Check tables, images, page breaks and signature positions before publishing. Import is a starting point for a reviewed template, not a promise of exact rendering for every Word feature.
Versions, deletion and default templates
Publishing an edit creates a new template version. Existing documents stay bound to the version they were created with. Deleting a template removes it from normal selection without deleting documents or copies already based on it.
Add default templates in the criminal-justice library installs missing supplied templates, restores deleted defaults and can publish supplied updates. It preserves active custom versions. Restoring a deleted default uses the shipped layout, so review it before use. Normal startup does not overwrite your active custom template or restore templates you deliberately deleted.
The five approved register defaults (RNC, RMC, RDC, RLC, RBC) publish their current supplied revision automatically while their latest and published versions remain uncustomized defaults. Repeated startup does not create duplicate versions. Other templates retain their publication choices, and existing documents and prints keep their original versions.