
Browse docs
Handling Editor
Give each vehicle the driving feel that fits your server. Adjust handling directly in-game, test the result on the road, and keep the setups you want to use again.
Getting started
The Handling Editor is an administrator tool. Access requires the handlingeditor command permission; having a mechanic job alone does not grant access. The shipped permission groups are god, superadmin, and admin.
- Sit in the driver seat of the vehicle you want to tune.
- Enter
/handlingeditorin chat and check the vehicle name and plate in the header. - Choose Simple or Advanced, make your edits, and review them under Changes.
- Select Apply. Use Current vehicle for your first test, then confirm the handling basis and apply the changes.
- Open Telemetry, select a test mode, choose Start test, and then Drive. Press F7 with the default controls to return to the editor.
- Use Save profile to keep the setup. Once tested, you can apply it permanently to a plate or model.
Editing, importing, or loading a profile prepares a draft. Apply changes the vehicle; Save profile keeps a reusable setup. Closing the editor does not undo changes you have already applied.
An authorized administrator can also use /handlingeditor [playerId] for another online administrator. The target needs editor permission and must be in the driver seat. From the server console, provide a player ID. See Permissions for command-access setup.
Editor features
Open a feature below for its controls, examples, and screenshots. Select a screenshot to view it at full size.
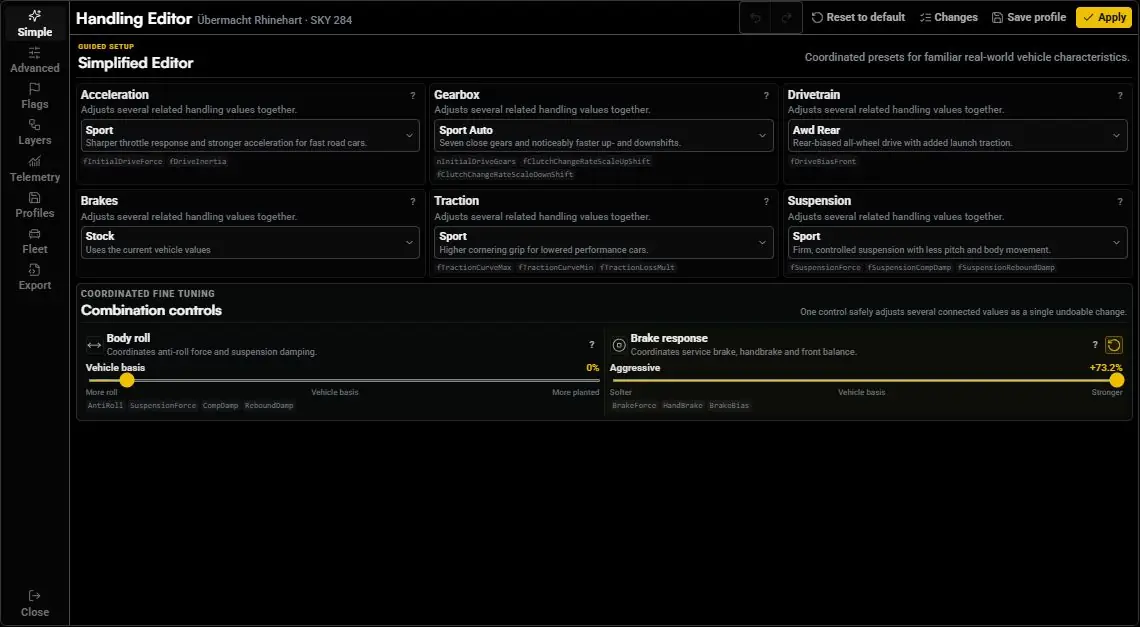
Simple groups related handling values into accessible presets and controls. Use it to establish the overall feel of a vehicle before fine-tuning individual properties.
- Choose presets from the dropdowns for the available tuning groups.
- Adjust Body roll to change how planted the vehicle feels.
- Adjust Brake response to coordinate braking strength and balance.
- Open ? to see an explanation and the handling fields affected by a control.
Simple and Advanced work on the same draft. You can switch between them as you refine a setup. Change one group at a time, review Changes, and use the undo and redo controls as needed.
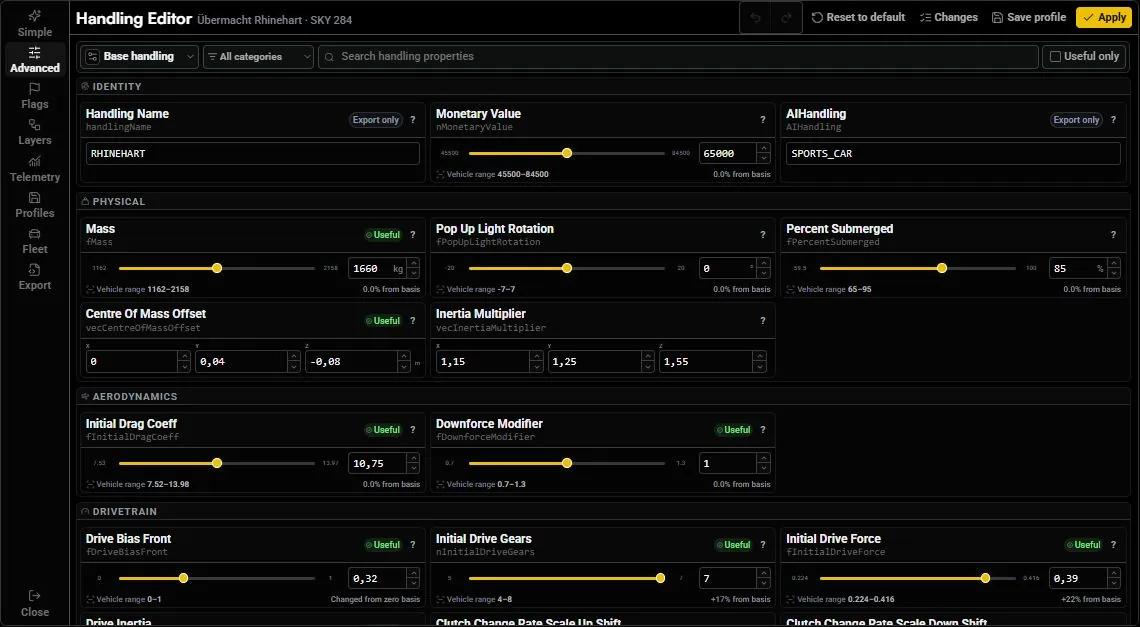
Advanced gives you individual handling fields with sliders, number inputs, units, and available explanations.
- Select the handling block, such as Base handling, from the first dropdown.
- Narrow the list with the category dropdown or property search.
- Enable Useful only to focus on common tuning fields.
- Edit the value and use Changes to review the draft before applying it.
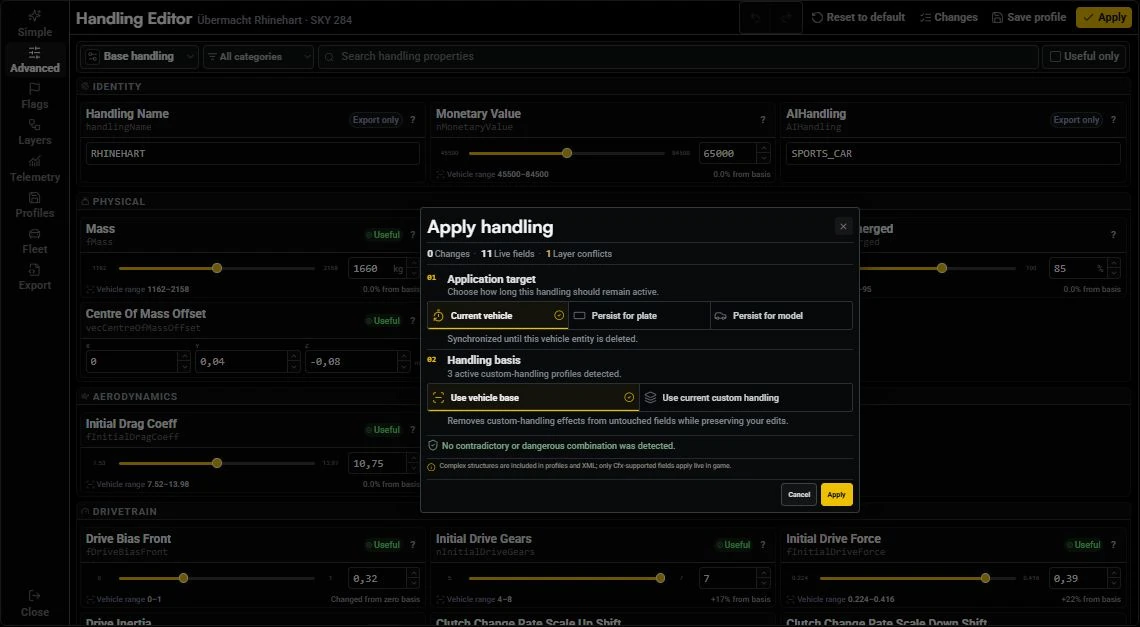
Choose where the changes apply
| Application target | What happens | When to use it |
|---|---|---|
| Current vehicle | Changes remain on this spawned vehicle until its entity is deleted. | A temporary experiment or first road test. |
| Persist for plate | A saved rule restores the setup when a vehicle with that plate is spawned. | A specific vehicle that needs its own handling. |
| Persist for model | A saved rule applies to that model; a plate rule takes priority for overlapping fields. | A tested setup intended for a whole model. |
Choose the handling basis
- Use vehicle base removes installed custom-handling effects from untouched fields while keeping your edits.
- Use current custom handling keeps the installed Mechanic handling and places your editor values on top.
Review the validation findings and confirm Apply. Fields marked Export only can be kept in profiles and exports, but do not change the vehicle live.
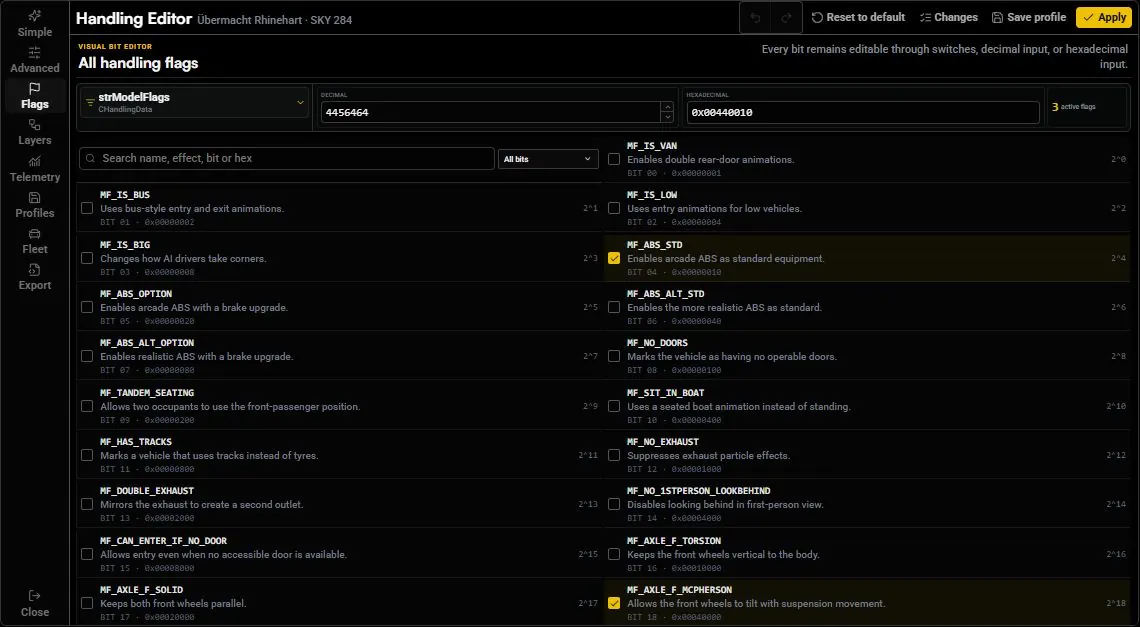
Open Flags, select a flag group from the dropdown, and search by name, effect, bit, or hexadecimal value.
Toggle individual bits or edit the decimal and hexadecimal representation. Read the available explanation before changing a flag and review the result in Changes.
Some flags have no reliably documented effect. Those entries are identified in the editor; a visible switch is not a guarantee of a specific driving effect.
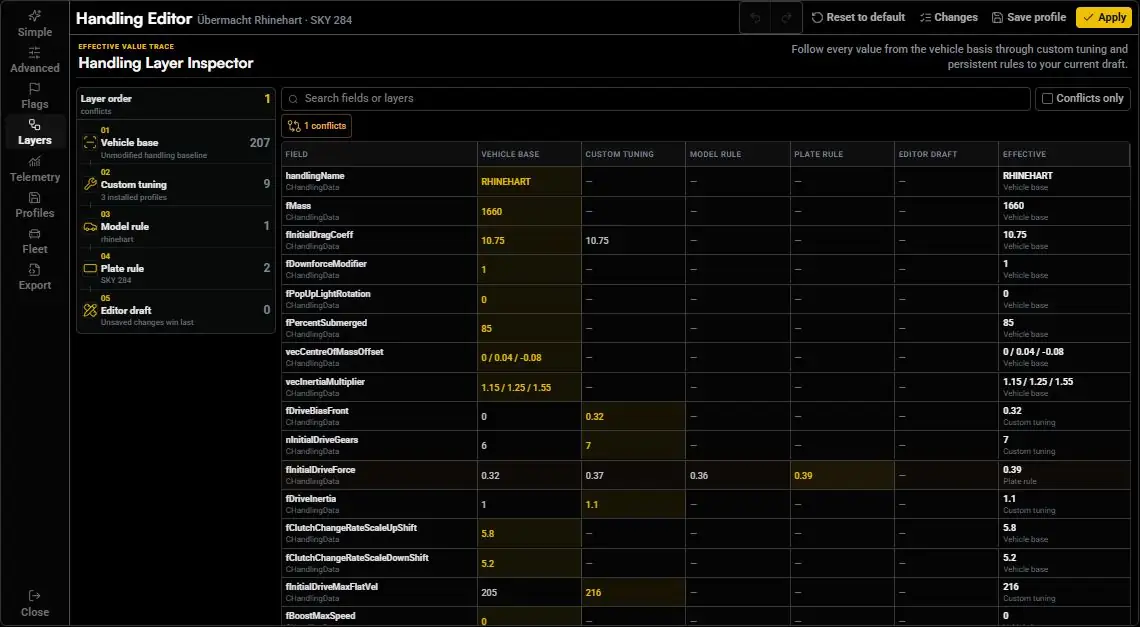
Layers shows how the effective handling is assembled. Inspect the layers in this order:
- Vehicle basis — the unchanged handling foundation.
- Custom tuning — installed Mechanic handling changes.
- Model rule — the persistent setup for the model.
- Plate rule — a more specific setup for that vehicle plate.
- Editor draft — the changes you are currently preparing.
Later layers take priority where they affect the same field. Use the inspector to find the source of a value and see which changes overlap. The editor draft still needs Apply before it becomes a live change.
If a vehicle behaves differently from the rest of its model, check its plate rule as well as the model rule.
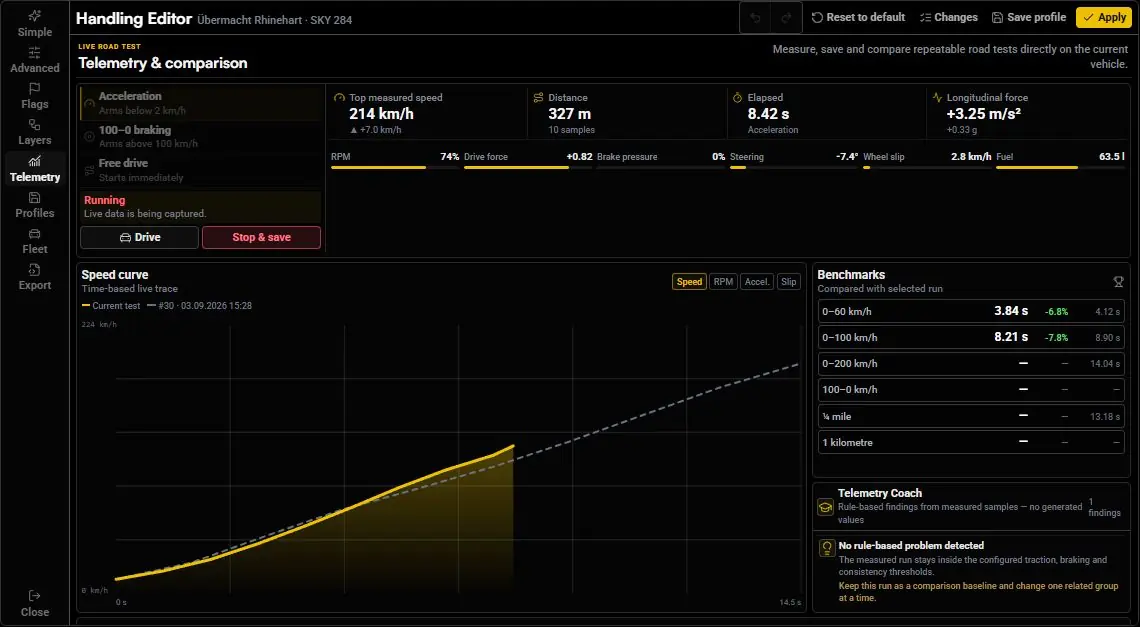
Telemetry combines live vehicle data, road tests, saved runs, and comparison graphs.
Start a test drive
- Apply your setup, then open Telemetry. Reopen
/handlingeditorfirst if the editor has closed. - Choose Acceleration, 100–0 braking, or Free drive.
- Select Start test to arm or begin recording.
- Select Drive to return control to the vehicle.
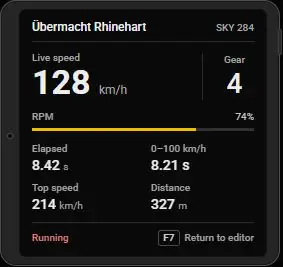
The full editor gives way to a compact telemetry tablet in the bottom-right corner. The tablet keeps speed, gear, RPM percentage, elapsed time, the relevant benchmark, top measured speed, distance, and test status visible while you drive.
Press F7 with the default controls to return. If your server changes the editor return key, use that configured key instead. Drive changes the view; Start test controls recording.
Choose the right test
| Test | How it starts | How to finish |
|---|---|---|
| Acceleration | Arm it while stopped; capture begins when you reach 2 km/h. | Return and select Stop & save after the measurements you need. |
| 100–0 braking | Reach at least 100 km/h. Measurement begins as speed drops below 100 km/h. | Brake to a stop; the completed run is saved automatically. |
| Free drive | Recording begins immediately after Start test. | Return and select Stop & save. |
Compare the results
In Saved test runs, select Compare on a previous run. The graph and benchmarks compare the current test with that run. Use Clear comparison to remove it from the comparison view.
Keep the vehicle, route, and conditions consistent. Record a baseline, change one area of the handling, and repeat the test. A benchmark stays empty until its required speed or distance has been reached.
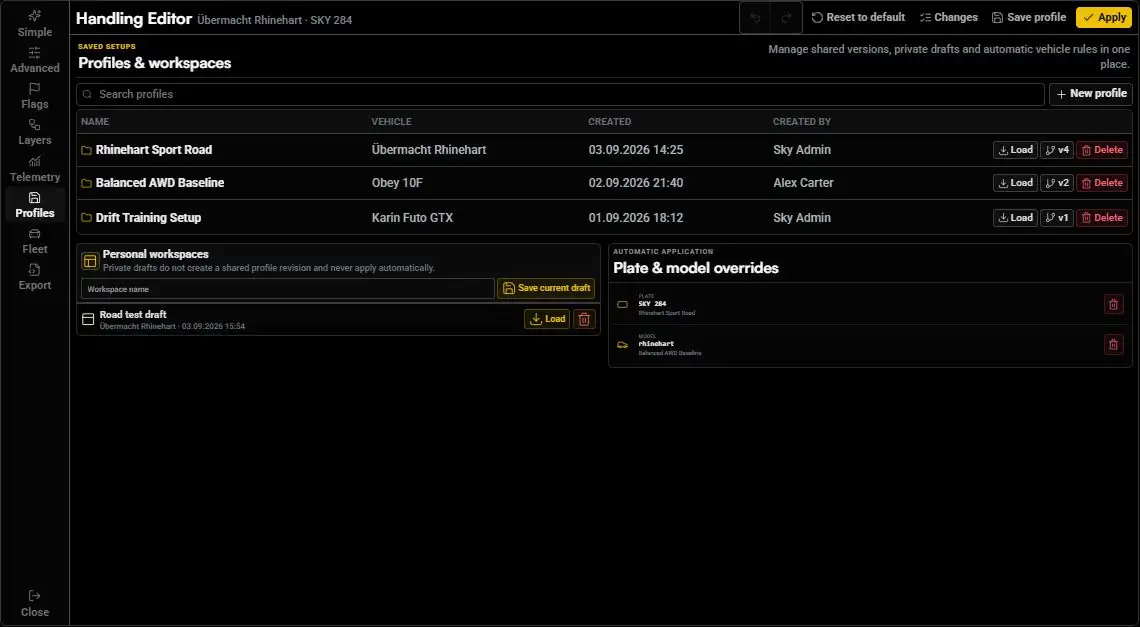
Profiles brings shared setups, revision history, private workspaces, and persistent override information together.
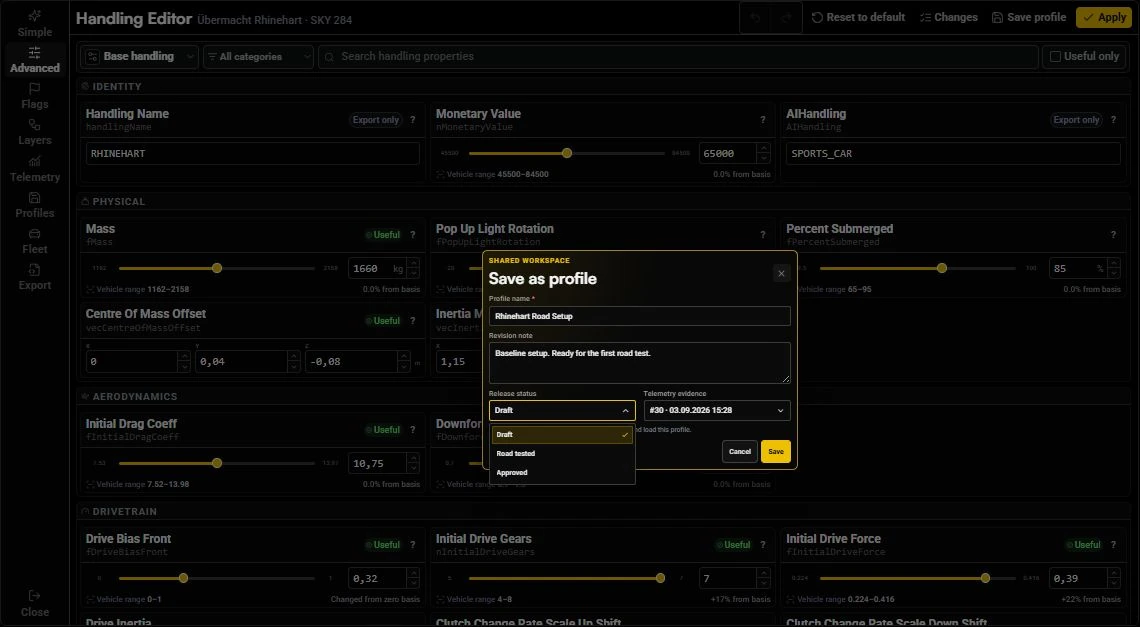
Select Save profile and enter a name that identifies the vehicle and purpose. When profile versioning is enabled, you can also:
- Add a Revision note describing what changed.
- Choose Draft, Road tested, or Approved in the Release status dropdown.
- Link a saved run through Telemetry evidence.
- Update the loaded profile or save a new profile with its own revision history.
Load and revise a shared setup
Search the profile library and select Load. Review its values, make your edits, and save an updated revision or a separate copy. Select a profile to review its history and restore a previous revision when needed.
Shared profiles can be found and loaded by other administrators with editor access. Saving, loading, or marking a profile Approved does not publish a vehicle rule. Use Apply and choose the intended target when ready.
Keep an experiment private
Use Personal workspaces to save a private draft without creating a shared profile revision. Workspaces do not apply automatically.
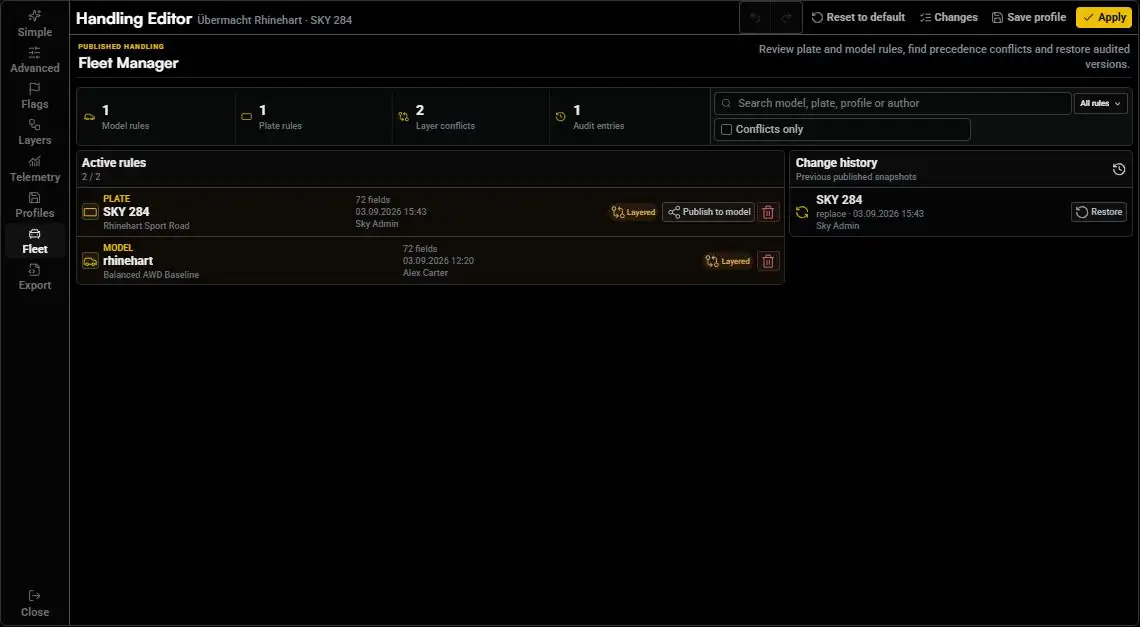
Fleet is the management view for published handling rules.
- Search for a model, plate, profile, or author.
- Use the scope dropdown to show all rules, model rules, or plate rules.
- Enable the conflict filter to find overlapping rules.
- Review change history and restore previous published snapshots.
- Remove a persistent rule or use Publish to model to extend a plate setup to the model.
A plate rule takes priority over a model rule for matching fields. Review the target before publishing a wider change. Closing the editor does not remove these saved rules.
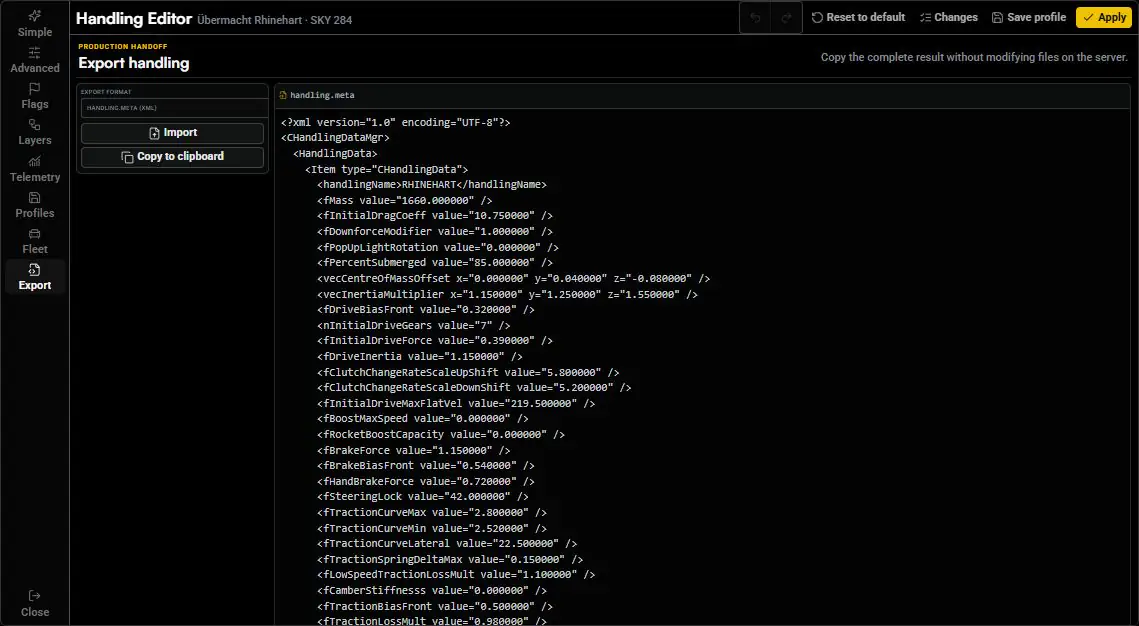
Export lets you move setups between the editor and your handling-file workflow.
| Format | Use it for |
|---|---|
| XML | Handling data for a handling.meta workflow. |
| JSON | A Sky handling snapshot you can import back into the editor. |
Choose the format from the dropdown and select Copy to clipboard. Exporting does not overwrite files on your server.
To bring an existing setup in, select Import, choose a JSON, XML, or META file, or paste its contents. The file picker accepts files up to 1 MB. Select Load into editor, review the imported values, and use Apply or Save profile as appropriate.
Server settings
Editor settings can control the layer inspector, field explanations, validator, telemetry coach, profile versioning, workspaces, fleet management, and flag search. Available handling blocks also depend on the current vehicle.
With the Job Configurator enabled, manage editor settings through /jobconfig. When it is disabled, Config.HandlingEditor in sky_mechanicjob/config/config.lua supplies the settings. See Configuration for how the two configuration modes work.